So, I like to cut my images out and stick them onto my scenes. The reasons I choose to do this are many:
- I like the colors very vibrant (emboss resist tends to alter the color)
- I'm messy (you should see me with the embossing powder!)
- This allows me to color on the go and have images pre-colored
- I can allow my image to hang over the surrounding frame a bit. I LOVE that!
- I love digital images so obviously its the best way for those
- I have Eclipse tape (fabulous product) but I'm still learning to trust it (scared I'll smear ink underneath). Need more practice here
- I may have received the image in a swap so I may not have the original stamp
- I could keep going
So I've developed a few techniques to make this cutting easier. As I said, I'm messy so I always trim my images over a piece of scrap paper. Then I don't have those little pieces floating all over. I can just pick the sheet up and pour it into the recycle bin. Also, a good pair of scissors is a MUST. I use Stampin' Up's Paper Snips. I always cut the larger areas first so I don't accidentally break off any details.(you can click on these pics to make them bigger if you need to)
TECHNIQUE #1 CUT THRU THE IMAGE - You can cut thru the image in some strategic places to get to the white area. In the example below, you can see that I cut right on the line between Tilda's two boots (see red dots). I was able to get into that little area and cut the white paper out so the scene will show thru. I did the same thing under the pink balloon. I carefully cut along the line to get in and remove the white area between Tilda and the balloon.
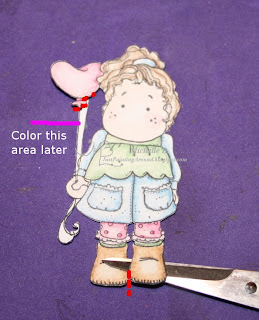
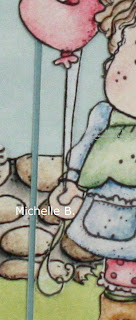
TECHNIQUE #2 CUT AROUND AND COLOR IT IN - You'll notice above that I was not able to cut the area between the 2 balloon strings. Those strings are just too thin. So, I just left the white space between them. Now, if you look at the curved parts at the bottom of the balloon strings, I had to leave some white. DO NOT cut in straight lines and this will not show as much.
When I attach the image to the scene, I color those white areas in to match what's behind them using my blender pen and ink pads. I also prefer to just dab the pen onto the paper rather than move it around - prevents pilling. (NOTE: I had to color blue, brown, and green to hide this one!) Here's a closeup of the finished card. You really don't notice that I've done this.
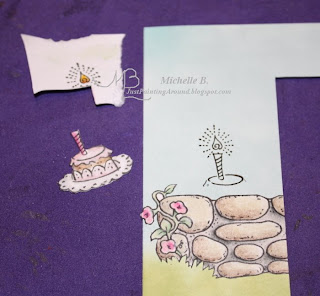
TECHNIQUE #3 PAPER PIECE IT - This is my favorite way to deal with all those little tiny details such as the glow around the candle below or Stamping Bella's little stick arms. I simply use my Stamp-a-Majig (another MUST for me) to line up where I want the image to go and I stamp it onto my scene (sometimes I just stamp the part with the tiny details as I did here). I cut out and color my image separately and just act like I'm paper piecing and glue those parts onto the stamped area.
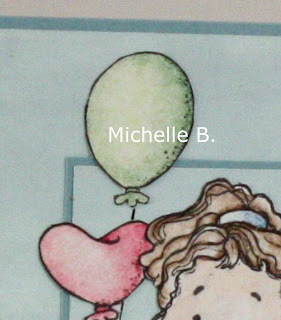
TECHNIQUE #4 DRAW IT IN - And sometimes I have no choice but to draw something in myself. As you can see in the image above, I accidentally cut off her green balloon. The string was just too tiny. So on the finished card, I drew that little line in myself with a ruler and a fine tip marker. You can barely tell the difference between the string on the green balloon and the string on the pink balloon.
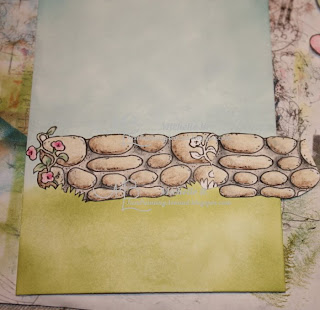
BONUS TIP - And I was really sneaky on this card with the wall. I wanted the wall to be longer than the original stamp so I simply hid the area where the two stamps meet BEHIND Tilda. Here's what it look like before I put Tilda on. Ha!
Hope these ideas save you some time and frustration in your cutting (and I'll bet you'll be zooming in on my cards more often! Ha!)
Enjoy!
Michelle B.
"Queen of the Scene"


3 comments:
Wow! These are excellent tips! I never thought of cuttin THROUGH...duh! That's gonna make my life a lot easier! Thanks Michelle...I always look forward to your Tips & Tricks Tuesdays!
I have never really thought about cutting my images out before. I really like the look it gives and it does leave you with so many options. Thanks for all your tips...I'm gonna give this a shot! :)
Great tips, thanks for sharing these :)
Alex from England x
Post a Comment