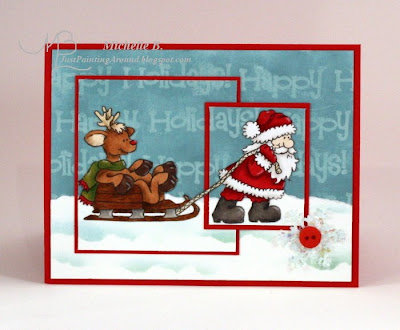
 I made this about 4:30 am Monday morning but I had to get to work so I'm finally getting around to getting this posted. I am still stuck on words in my background from last weekend's cupcake adventure! Ha! I used the sketch from CCEE and I used a button for High Hopes challenge # 23.
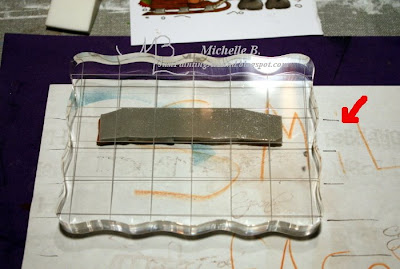
First, I'd like to show you how I lined up those words in the background. I placed my stamp in between the lines of a lined acrylic block. I transfered those lines onto a piece of scrap paper (see the little black lines). Then when I was stamping, I just moved down a row. If I hadn't done this, I would surely have crooked words! The words were stamped using Versamark ink onto Soft Sky cardstock and embossed with clear detail embossing powder.

Now let's go onto those snow drifts that I promised you. First, I cut a piece of Whisper White cardstock to the size for my snow area and tore the top of it off for texture (you must use a slick surfaced cardstock like this). I used another torn piece of cardstock as a mask. You can see that this is a well loved piece! However, I made a HUGE mistake here.... DO NOT use cardstock with green ink on it when you are stamping with blue. More on that in a minute.
Ok, so I place my mask where I want to sponge staying level.

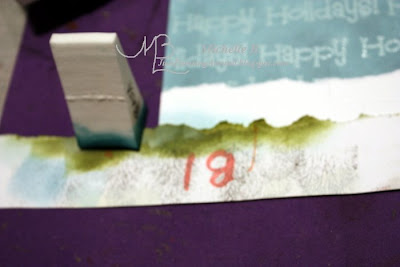
Then I sponge Baja Breeze (I recommend you start with Soft Sky for a more subtle look) onto the Whisper White cardstock. I will often go from the inkpad, to a scrap (see the blue spot on the mask below), and finally to my piece. This prevents me from getting to dark and I can identify any problems on the scrap before I ruin my piece. I always start with my sponge half on and half off the mask. I will pinch the sponge so only a little of it touches the piece and I will not get any hard edges. Then I gently work side to side and then move upward as I continue to move side to side. As I run out of ink, I'll be left with a nice soft edge. I never "double dip" meaning I only go to the ink pad once per snow drift. HINT: Some people may find it easier to turn the piece upside down and work downwards towards themselves. Please refer to my sponging tips n tricks for more info. (sorry for the blury pic)

And here is what you will have when you remove the mask. Notice that my hill ends on a downward slope. I always try to end a drift in a down position so you get a full hill not just half a hill.
Then I move the mask around and repeat the process. I wasn't trying to portray a lot of distance here but if I were, I would do bumpy hills in the front and thin flat ones in the back. Those distant hills would also be smaller left to right. I just use a smoother area of the mask to get this shape. Here's an example with the arrow pointing at a thin flat distant hill.
Now, can you see why I had a problem with that green mask? As I was sponging, some of that green transferred to my sponge. My drifts on the left are blue but by the time I get to the right, I'm lookin' kinda green! Good thing I was planning to put a button and snowflake over there! (and I'll have to throw that sponge away!).
I hope you'll give this a shot and let me know if you have any questions.
Stamps: High Hopes Reindeer Games, High Hopes Happy Holidays
Paper: Soft Sky, Whisper White, Real Red
Ink: Baja Breeze, Soft Sky (just on the snowflake)
Accessories: Copics, Prismacolor pencils and Goo Gone, clear detail embossing powder, Virsamark pad, heat gun, mica flake glitter, snowflake punch, SU button
How I color.
How I get those layers to line up across the scene: My Cut then Ink Technique
Enjoy!
Michelle B.
"Queen of the Scene"


9 comments:
This is so cute Michelle!!! Love the HH holiday images!! Great tutorial!
Adorable Michelle, thanks for playing with us gals.
Oh I love it Michelle, thanks so much for playing
That is so precious - thanks for sharing all your great tips!
Really Cute! Great Tutorial!
This is absolutely wonderful! What a nice tutorial too! I love the way you did your snow. Your crevaces (spelling?) look like you could actually fall into them! What a precious card you made! Love that you joined our fun!
Fab tutorial! Super adorable card! I love the colors you used!
Love the design of this card! So original! AWESOME tutorial!
Thanks for showing how to unravel the mystery of how you did this amazing work of art!! Bless you and congratulations on being FS on SCS!!! Its a well deserved honor! Enjoy the afterglow!!!!
Post a Comment