I've been promising for a while to give you some info on how I color. I haven't had time to make a card with my DH out of town for 12 days so I thought I could at least get this done. I first heard about coloring with both Copics and Prismacolor pencils on one of my favorite blogs. You can find the entry here.
At the time I read this, I owned about 30 Copic markers. I felt like I had learned how to use them to get the shading I wanted, however, I just didn't have enough colors and couldn't buy them all right now! Ha! This technique allowed me to get all the shading I wanted, not have to own every Copic just yet, and get the fully colored in look of a Copic (not the rougher look of just a Prismacolor pencil).
This is long so just look at the pictures if you want the shortened version!
So, here we go:
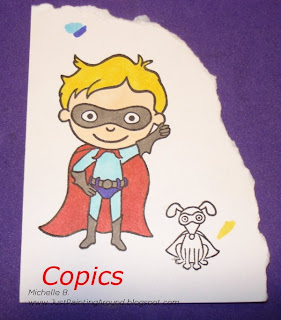
First I quickly color in the image using one color Copic marker per area. Because I'm not doing all the scrubbing and blending with the Copics, I do not worry about what type of ink the image was stamped with. Most of the time I just use my Versafine ink pad and Georgia Pacific Cardstock. I also receive a lot of images through trades so I don't know what type of paper and ink were used. I do try to avoid coloring over the black lines...just color right up to them without going over. It is better to go with the lightest shade of the color that you can here. We can darken it later.

Now for the best secret yet......I spray my image with a squirt of acrylic sealer. I heard this somewhere on SplitCoastStampers but cannot find the original post. I'd love to thank the person and give them proper credit so do tell if you know where I read this!
The sealer dries in just a minute and makes the surface of the paper perfect to blend with Prismacolor Pencils & baby oil. This step is not required and sometimes I do skip it but I'm always happier with my results when I use the sealer. Give it a try sometime!
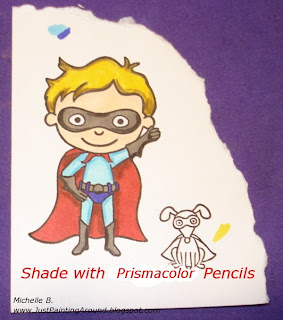
After that, I roughly add some Prismacolor pencil in all the areas I want to shade. Sometimes I go all around the area (like Billy's hair) and other times I just darken the areas that I want to shadow (like on Billy's cape). Don't be afraid to break the rules here.....you don't need to shade with the same family of color that you markered in. For example, I Copic'd Billy's hair in yellow and Prismacolored in brown. Giving him that sandy blond hair look. I usually Prismacolor in red on my orange Copic'd pumpkins. For black areas, I Copic in medium to dark gray and Prismacolor in the black.

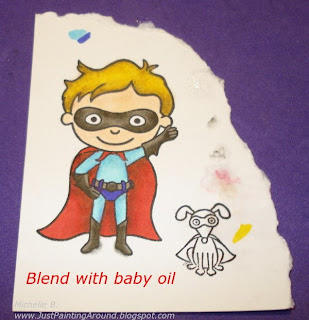
Next, I use baby oil gel (less messy than regular baby oil) and stumps to blend the Prismacolor pencil in. It's also fun to add a 2nd color of Prismacolor pencil in here as well.

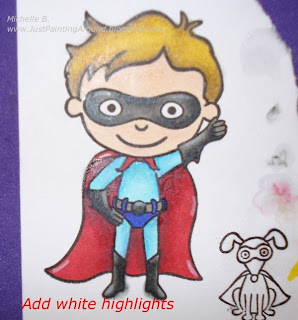
And the final, but very important step, is to add white highlights using the white Prismacolor pencil. This is especially important on darker areas (like Billy's cape) or areas you want to be shiny (like shoes).

Sorry that last image was a little rotten, that baby oil was really shining! You may notice that I have baby oil and Copic marker all around the edges of my image. I almost always cut my main image out so the area around him is scratch paper for me to wipe off my stumps or test colors.
You can see this image in his finished card here.
So, now you know.
Enjoy!
Michelle B
"Queen of the Scene"


4 comments:
Amazing! And do you color this way ALL the time? Everything really looks amazing...no wonder!
Thanks for sharing this! Your coloring is always so awesome, and it's nice to have insight into how you do it. I'm going to have to give this a try...and a lot of practice!
Wow Michelle!!! That is soooo cool to actually see!! I know I just need to practice but I am such an "instant gratification" kinda gal!!!!! LOL
Thank you for the lesson. It is such a help when someone does that. I know it is a lot of work to make the lesson but it is greatly appreciated. Great work
Post a Comment